
If you want to know how to increase grip strength for rock climbing quickly, the most effective way is by training finger-specific strength with tools like hangboards, grip trainers, and controlled dead hangs. You also need to improve forearm endurance with exercises like repeaters, rice bucket drills, and max hangs. Grip strength is the limiting factor in many routes, especially when you’re trying to hold on with just a few fingertips during fingertips-only rock climbing.
This guide covers what to train, how often, and why it works. You’ll learn the key methods, like using different grip positions (crimp, open hand), rest-to-work ratios, and how to avoid injury by progressing carefully. Whether you’re climbing V0 or V6, you’ll walk away with a simple, targeted plan that fits into your week and actually builds real strength where you need it. Let’s get into it.
Table of Contents
What Makes Grip Strength So Important for Rock Climbing?
Grip strength influences more than just how hard you can pull. It dictates how long you can hang, how well you recover between moves, and how efficiently you can transition from one sequence to the next. Fatigue here is brutal and unforgiving. When your grip fails, the rest of your body doesn’t matter. You fall.
Real-world example? A V5 problem might feel V8 when your forearms are shot from a prior climb. On long routes, the inability to rest your grip often separates a redpoint from a failed attempt.
There are three fundamental grip types every climber must master:
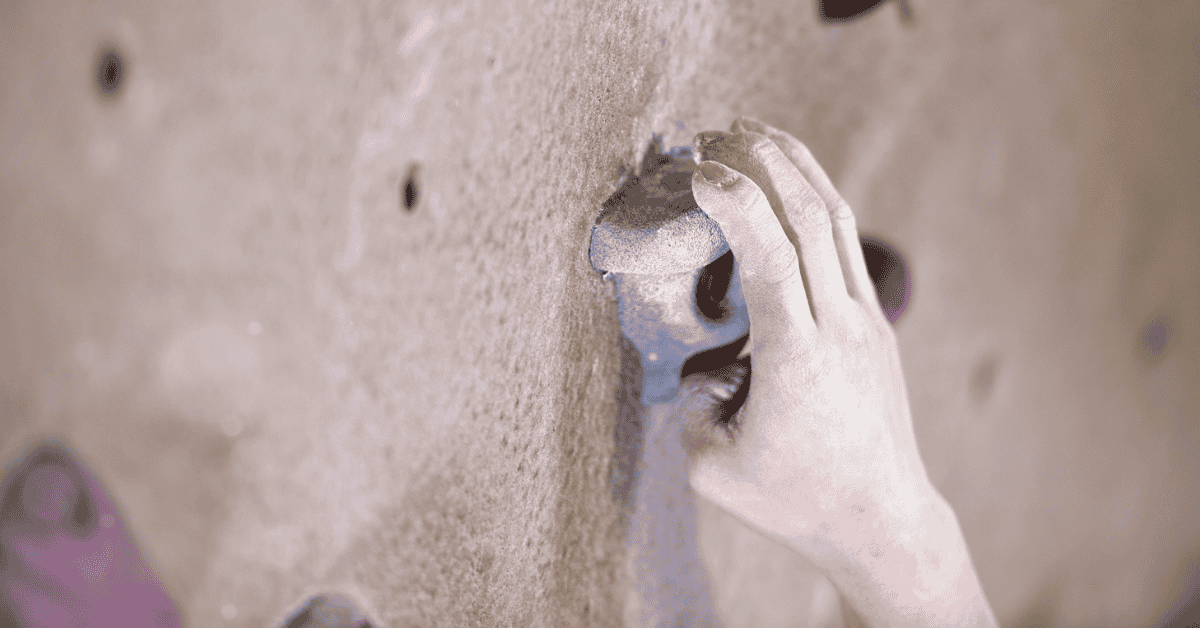
- Crimp: Used on small, sharp edges. The distal joint of the fingers is hyperflexed, making it powerful but risky for tendons.
- Pinch: Requires the thumb and fingers to press against opposing surfaces. Excellent for building thumb strength and contact force.
- Open-hand: Fingers are extended and relaxed across a large hold. It’s the safest, most sustainable grip for endurance.
What Are the Best Exercises to Build Grip Strength Fast?

To learn how to increase grip strength for rock climbing, isolate and overload. Start with:
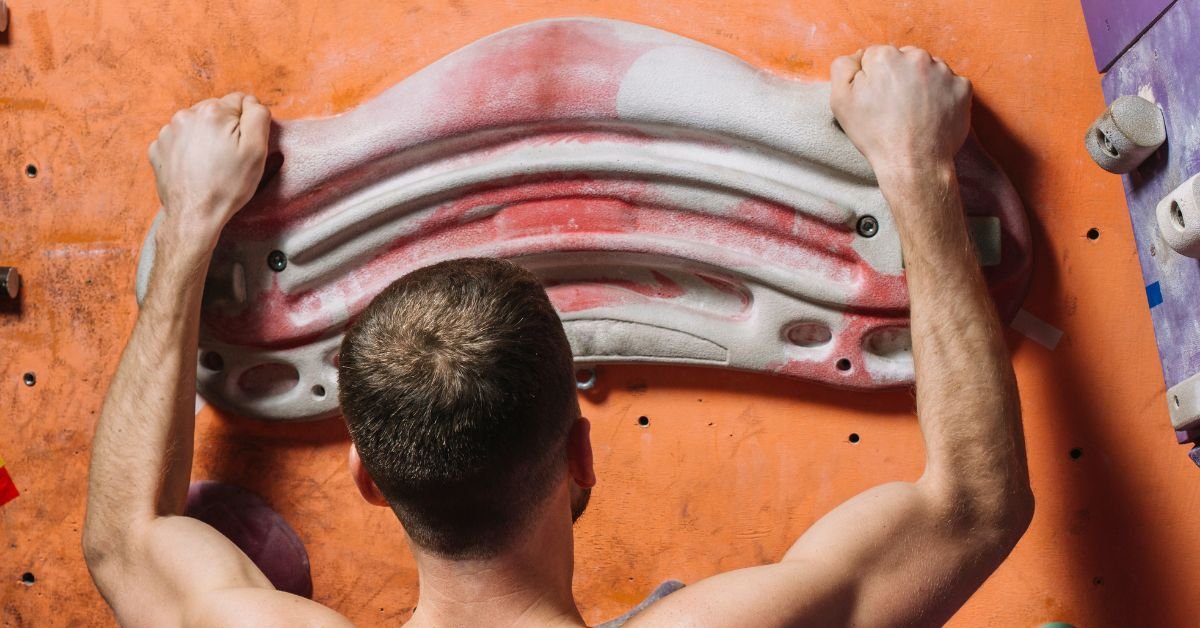
- Dead Hangs: Use a hangboard. Hang with straight arms, scapulas engaged. Start at 10 seconds, progress to 20. Perform 3–5 sets with 1–2 minutes rest.
- Towel Hangs: Loop a towel over a bar. Hang by gripping the towel ends. Great for pinch strength.
- TRX Rows with a Twist: Pull body toward handles, pause at the top, then rotate wrists to add forearm tension. Builds integrated pulling strength.
- Plate Pinches: Hold two weight plates together, smooth side out. Hold for time. Trains crushing and pinch strength.
Tempo matters. Avoid swinging. Use controlled reps. Progressive overload is critical—add time, weight, or reduce hold size. Train 2–3 times per week. Prioritize recovery.
No gym? No problem.
- Doorframe Hangs: Use the edge of a solid doorway, but always test first.
- Towel Pull-ups: Loop towels over anything stable. Use as pull-up handles. Builds finger and palm tension.
- Rice Bucket Drills: Submerge your hand in a bucket of rice. Twist, grip, squeeze, extend. Targets all small hand muscles.
Train these 3–4 times weekly. Track progress with time under tension or rep counts. Use items like thick books, water jugs, or broom handles for resistance. Creativity is strength training’s best kept secret.
Mobility training can also help improve your grip strength. Without wrist and shoulder mobility, your fingers overcompensate.
- Wrist Circles and Extensions: Improve range of motion for holds
- Scapular Mobility Drills: Strengthen the platform your grip relies on
- Thoracic Extensions: Unlock full body coordination in dynamic moves
Mobility work reduces compensatory tension. That means fewer tweaks, better blood flow, and longer sessions on the wall. It’s no wonder climbers with better shoulder and hip mobility often perform better.
You can also combine grip training with climbing practice. You don’t need separate sessions.
- Warm-Up: Do 2 sets of 10-second hangs before bouldering.
- Cool-Down: Use rice buckets after climbing to flush out the forearms.
- On-the-wall drills: Downclimbing, lock-offs, and slow traverses build grip endurance.
Sample Hybrid Training Day
- 10 min dynamic warm-up
- 30 min bouldering
- 15 min dead hangs
- 10 min rice bucket + stretching
Grip work folds easily into a regular climbing day without overextending your session.
How Can You Track Your Progress in Grip Strength?
Track progress in a simple journal or app like Crimpd. More importantly, watch your climbing: Are you resting more easily on routes? Holding slopers longer? Recovering mid-pitch? That’s progress.
Use these objective benchmarks:
- Maximum hang time on a given edge
- Amount of added weight during hangs
- Reps of towel pull-ups or pinch holds
If you’re learning how to increase grip strength for rock climbing, you’ll find it responds to consistent, focused effort. You should expect these results:
- Weeks 1–2: Neuromuscular coordination improves
- Weeks 3–4: Endurance gains become noticeable
- Weeks 5–8: Measurable increases in hang time and hold control
Maximal strength takes longer. Expect 8–12 weeks for substantial gains. But endurance and control improve faster—if you’re consistent and smart.
That said, plateaus are inevitable. They signal adaptation. Here’s what you can do to push through:
- Change grip types weekly (crimp, pinch, sloper)
- Increase volume or intensity
- Use hangboards with varying edge depths
- Train with grip trainers like Captains of Crush or rubber rings
Also, implement deload weeks every 4–6 weeks. Drop volume, maintain intensity. This helps tendons catch up and reduces injury risk. Add active recovery: swimming, light bouldering, yoga.
What Gear Helps Support Grip Strength Training?

You can have perfect form and a bulletproof plan, but your gear matters. You don’t need a garage filled with elite training toys, but the right tools can speed things up.
- Hangboards: Excellent for isolated finger training. Use with caution.
- Grip Trainers: Easy to use anywhere. Choose progressive resistance.
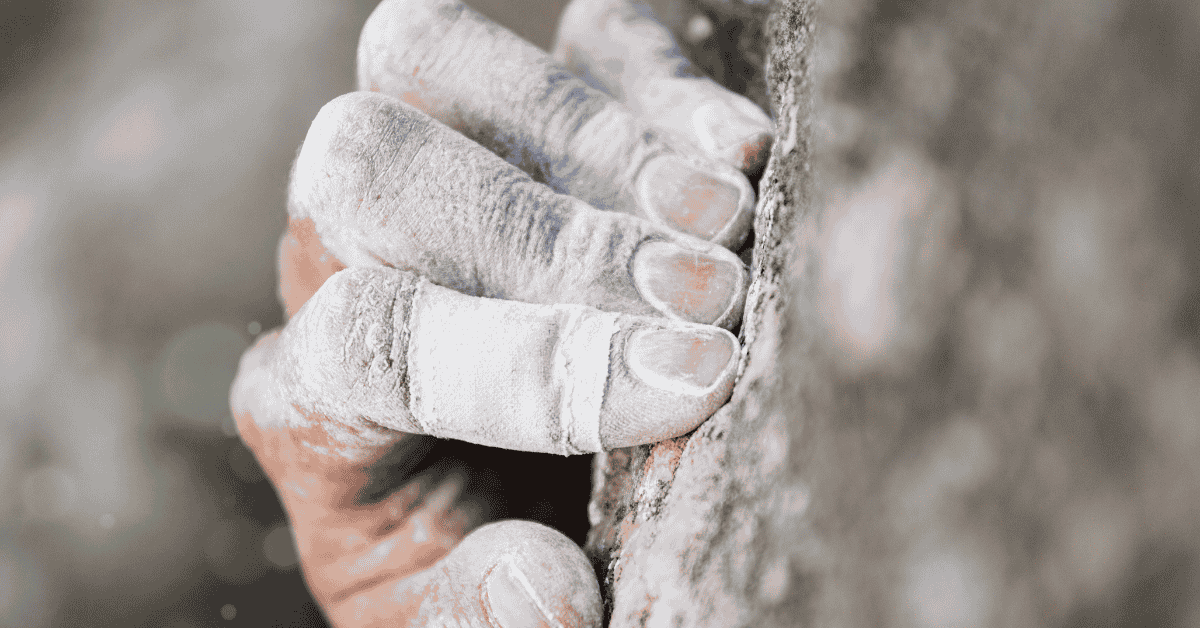
- Chalk: Essential. Moisture kills grip.
- TRX Straps: Great for integrating grip with pulling strength.
- Portable Bars: Good for travel workouts.
Takeaway Message
When your fingers are strong, coordinated, and conditioned, they give you the freedom to move with confidence. They let you trust that shallow crimp, commit to a dynamic move, and stay calm.
Fortunately, learning how to increase grip strength for rock climbing isn’t complicated. It’s measurable. It’s practical. And it’s fast if you train with intent.
You May also Like
Practical Ways to Handle Common Climbing Finger Injuries
Common climbing finger injuries happen more often than you might think, especially if you’re pushi
Beginner’s Complete Guide To Finger Strength Training For Climbing
Finger strength training for climbing is the foundation that supports your entire climbing experienc

Practical 12-Week Climbing Training Plan for the Best Results
If you’re looking for a structured way to get stronger, climb better, and stay injury-free, this 1